- A+
Brother 7010 Printer Driver Download and Installation Guide
If you have recently purchased the Brother 7010 printer and are looking to set it up for the first time, you may need to download and install its driver. A printer driver is a software that allows your computer to communicate with the printer and tell it what to print and how to print it. This guide will take you through the steps of downloading and installing the Brother 7010 printer driver.
Step 1: Identify Your Operating System
The first step in downloading and installing the Brother 7010 printer driver is to identify your computer's operating system. Brother provides drivers for Windows, Mac, and Linux operating systems. To find out which operating system you are using, go to the Start menu if you are using Windows, and click on "About this Mac" if you are using a Mac computer.
Step 2: Visit the Brother Support Website
Once you have identified your operating system, visit the Brother support website at www.brother.com. Click on the "Downloads" option in the main menu, select "Printers" from the drop-down menu, and then select "Brother 7010" from the list of available printers.
Step 3: Select Your Operating System
Next, select your operating system from the list of available options. If you are using a Windows operating system, you will need to select the version of Windows that you are using. If you are using a Mac operating system, you will need to select the version of macOS that you are using. If you are using a Linux operating system, you will need to select the correct Linux distribution that you are using.
Step 4: Download the Driver
After selecting your operating system, you will be presented with a list of available drivers for your Brother 7010 printer. Click on the "Download" button next to the driver that corresponds to your operating system. The driver will then begin downloading to your computer.
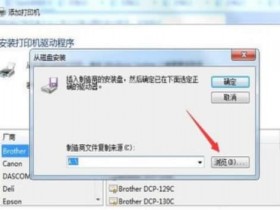
Step 5: Install the Driver
Once the driver has finished downloading, locate the file on your computer and double-click on it to begin the installation process. Follow the on-screen instructions to install the driver on your computer. You may be prompted to restart your computer after the installation is complete.
Step 6: Test Your Printer
After installing the Brother 7010 printer driver, you can test your printer by printing out a test page. To do this, open a document on your computer and click on "File" and then "Print." Select the Brother 7010 printer from the list of available printers and click on the "Print" button. If the printer prints the document correctly, then the installation was successful.
That's it! You have now successfully downloaded and installed the Brother 7010 printer driver on your computer.
Conclusion
Downloading and installing the Brother 7010 printer driver is a simple process that should take only a few minutes. By following the steps outlined in this guide, you can ensure that your printer is set up correctly and ready to use. If you encounter any issues during the installation process, refer to the Brother support website or contact their customer support for assistance.
- 我的微信
- 这是我的微信扫一扫
-

- 我的微信公众号
- 我的微信公众号扫一扫
-